Monday, June 11, 2012

Alaire's "Little Table"

I am sure I am not the only one who has fallen into the pottery barn kids furniture trap.  I will find myself an hour deep into searching their site or looking through their catalog to come to the same conclusion every. single. time.  That S%!* is expensive.  I could do one or two pieces, such as a coat rack and a picture frame and that would wipe out my budget of $300-400 dollars for the room.  Most of the stuff that I want from there are the tables, the shelves, and the kids playroom storage.  I'd like to meet the mom that doesn't want their kids playroom to look like this:

Source

 or this
Source
 or this
Source
If you object to wanting one of these rooms, go ahead and click that red X in the top corner of this page.  How can anyone not want something so clean organized and damn good to look at?  
The truth is, we all want these, but not everyone can justify the $1500 dollar price tag on the storage wall alone, minus all of the bins and containers.  

Someday I would love a whole room like one of those, but for now I just want a great table for Alaire.

We have a bar height kitchen table, which we like, but for kids coloring and painting, it isn't great.
Every time something drops, and believe me you something always drops, I have to pick it up.  Or, Alaire gets down and brings paint and markers and glue and paper scraps with her.  

My solution was to build her a table to do arts and crafts on, but something she can eat at for snacks and lunch and  when we have friends over. Something that is short enough that she can stand at or sit at and get up and down easily. 

I told Alaire that I was going to build her a little table to do her crafts at, and she got excited.  She told me "mama you make you big table and you make me a little table.  You sit at you big table and sew dresses.  I sit at my little table.  Gimme my sewer machine back mama.  Go to the garage and get you hammer."  I guess that is what happens when your child knows that you can build things.

Originally I thought about building Ana White's Clara Table.  It is super cute and simple and you can paint or stain it to your preference.  But, then I decided I wanted something pretty and more curvy and something that didn't look like a little kids table.  I wanted something that would fit in with our home and would look good sitting int the middle of our kitchen or living room. I also wanted something bigger that looked more like a dining table but for little ones.


I love Pottery Barn's tables, but their straight legged table that is similar (but smaller) in size is right under $500.  Surprisingly that is with chairs, but  ehh no thanks.  

Here is what I came up with:


 Alaire loves it!!! So do I!!!
If you are interested in the build, it was super simple!
I bought four unfinished pine table legs at Lowes for around ten dollars each. (this was the most expensive part of the table)

Wood Supply Lists
4 unfinished pine legs @ 21.25" or 1-2x2 @8ft 
3- 1x3 @8ft
1 sheet of 3/4" smooth plywood or 1 sheet of 1/2 inch smooth plywood 
optional: trim for table top edging

CUT LIST
2-1x3 @41"
2-1x3@ 23"
plywood 30x48
***if you are using 2x2's for legs you will need to cut 4 at 21.25"
(you will need to cut the support boards out of the 1/3's as well)

I used a Kreg Jig (which is AMAZING BTW) to join the aprons to the legs.


Measure the distance between the long aprons and cut three support bars.  Two would probably be enough but I KNOW kids will be sitting and standing on this thing, so better safe than sorry.

Drill out holes with the Kreg Jig in the support bars to attach them to the aprons and to attach them to the table top. 


The Lowes I went to didn't stock 3/4" smooth stainable plywood.  They only had 1/2".  Because I am the type that must get this table built right NOW, I bought a sheet of the 1/2" and had them cut it at the store into 2 pieces measuring 30x48.  I used wood glue and clamped the two pieces together, as pictured above.  I put weights on it to make sure the whole sheet was clamped down.

I painted the base.  I used the color Pillow Mint by Valspar for the base color.  I dry brushed on Aqua Ocean and then I sanded the edges and used Dark Walnut Minwax Wood Finish to stain the sanded areas.

I stained the top the next day after the glue had dried. I used the Dark Walnut Minwax for the table top as well.  I haven't done it yet, but I will put a few clear coats on the whole thing to protect it from this girl:
It never fails.  She finds these flags everywhere we go, especially Lowes.
Sorry that picture cracks me up every time I see it.  She is just screaming and running through Lowes with a mini American flag.  She must have seen something about relay racing on TV and always waves the flag and says, "jump mama" and then I jump and she says, "you did it mama, you won the race".  I love it!  I don't think I have or ever will win an athletic race, so jumping across a crack in the concrete floors at Lowes to win Alaire's race seems pretty awesome!

ANNND back to the table.

After the table top and the base are dry, drill the base into the table top and flip that thing over and enjoy!  I put floor protectors on the legs to keep it from scratching my wood floors up.  Alaire flipped when she saw it.  I love bringing things like this into the house when she is outside and then seeing the look on her face when she discovers it.

Here is one more look at the final product.


 I still have to put the trim and the clear coat on it.  I also have to get some seating for it.  I have a few cute ideas for that!

Craft Room

My craft room/studio has been in one of our upstairs spare rooms since we moved in.  It is a great space with a large walk in closet.  The only problem is that sometimes I need to be on the main floor when I also want to be using my studio.
I would love to be able to fix dinner and use my studio at the same time or stay up late and not bother anyone with noise.  
I have seen a lot of bloggers share their studios that they have put in a sitting room or dining room that doesn't get much use. 
Our sitting room has been used as an office since we moved in.  It is very very open and exposed the the rest of the main floor, especially the front door.  I thought I would have to literally have a drawn out diagram and a written, signed and notorized contract with my husband for him to even consider letting me bring my "crafting landfill" to the office on main floor.
I will admit it, I WAS WRONG.
I showed him this room for Being Brook.
Source

I found Brook's blog through Ana-White.com  I fell in love with Ana's plans for the Modern Craft Table. I had been looking at it for a while and had plans of building it someday! ( I hate saying that "someday".  Why not today right?  Better yet, why not YESTERDAY?)
Anyway, I showed Drew the picture above.
Me: Isn't this table amazing?  I mean the whole room is amazing.
Drew:  That is awesome.  You could do that.
Me: Her room is on the main floor though
Drew: So... Put it in the office.
Me: OMG are you serious.  I have been thinking of asking but thought you would say no.
Drew:  Why?  Just keep it clean and I don't care

!!!!!!!!!!!!!!!!!!!!!!!!!!!!!!!!!!!

So that was a few months ago.  I said I would probably slowly do the transition over the summer, so that I can figure out all of the storage and organization as I go.  Then last week I decided I was going to build that craft table.

Here is a picture of the office after I dumped a bunch of stuff in it that was sitting in my dining room.
Here are some pictures of the process:

I set up shop in my living room so I could work on it throughout the day.
Moved it to the garage to finish cutting all of the framing.


Side view.
End of Day One
Need to install shelves and framing and moulding.


Moulding added to the desk top.


End of Day 2

End of Day 3

Framing and bead board added to the front.

Behind the beadboard are three shelves.  I got the idea from this post.
I painted the desk a pale gray as I was building it, but it ended up looking too blue.  I didn't want to paint the walls again in the room, so I decided I am going to paint the table white.

I found this material at Hancock Fabrics and I am going to use it for the color scheme of the room.
This room has a long way to go, but I am loving all of the storage this desk provides! 

I can't wait to get it all painted and then move on to the next project!!
If you haven't checked out ana-white.com GO THERE NOW, and don't be surprised if you are instantly inspired and HOOKED!  I know I am !


Sunday, June 10, 2012

These last few weeks...


have been BUSY to say the least.  I have had a crazy amount of motivation and energy, so I am going with it and trying to get as much done as possible before I crash and burn.

  • (we) hung crown moulding in Alaire's bathroom
  • put hooks up in Alaire's bathroom
  • (we) hung crown moulding in our living room
  • painted the half bathroom on our main floor
  • laid new floors in the master bathroom
  • built a craft/tea party/mini dining room table for Alaire
  • built a craft table for myself (totally in love)
  • began clearing out the old craft room (scary scary borderline hording pics)
  • cleaned out the junk drawer (ridiculous what was in there)


Junk Drawer (1ftx2ft) 
Contents dumped


Contents organized
What was in that drawer?  Oh you know the usual.

  • million keys to nothing
  • liners for french fry holders (I know.. don't ask)
  • 2 tap lights
  • gorrila glue and super glue
  • two kinds of tape
  • headphones
  • 3 decks of cards
  • dog prescription
  • floss
  • photo magnets from high school
  • sewing kit
  • sunscreen
  • hand sanitizer,
  • tools galore (which included about 8 allen wrenches)
  • and a bunch of other junk including a pez  lamb from the easter bunny
I put all of the stuff back in the house where it belongs.  We no longer have a junk drawer, for now anyway!


I plan to take a picture every week of the garden we planted.  It's crazy how fast everything grows!
I planted them on Memorial Day.
Here is the vegetable box the day I planted:


Here is the vegetable box a week later (last Monday)

The zucchini on the far left sprouted and so did the broccoli in the middle.

Here is the fruit and herb box the day we planted:

Here is the fruit and herb box last monday:


Green pepper with a bloom!!

Broccoli sprouting.

Zucchini  sprouting!


On to my favorite part of the weekend...


QUICK Almond Butter cookies.
I am "sensitive"/allergic to all grains.  Yes, all of them.  Corn, wheat, rice, barley, oats, and any other one I forgot.  No, I am not kidding, no it isn't awesome, and please don't ask me why I don't weigh 100 lbs. (obviously because i find things I can still eat like almond butter cookies)  
You can make these with peanut butter too, but that's another thing I can't have : (
1 cup almond butter
1 cup sugar
1 teaspoon baking soda
1 egg
Mix them all together and bake at 350 for 10 minutes.
BOOM fastest easiest cookies ever.  They are good too!  
I won't go so far as to say they are good for you, but they don't have butter or flour in them, so they are better than regular ones : )


We ended the weekend by playing outside in the water.  This little thing just melts my heart.  "Mommy take my picture driving my car"
She has been saying some wild things lately.  It's super funny.  I love asking her questions about Drew and I and what she thinks we do or say.  We have been having the conversation about how Daddy has to work during the day and can't always be home like I can.  Blah Blah Blah.. no one wants to hear that cold hard fact
Me: Well Alarie if Daddy doesn't go to work you and mommy can't stay home and play and go to the park and the zoo and see our friends
Alaire:  Ok
Me:  Alaire Do you know what Daddy does when he goes to work?
Alaire:  He goes to the baseball game.
Me:  Really?
Alaire:  He hits the ball and runs
Me:  Awesome I hope he plays professional baseball and just hasn't told me yet : )

When we put her to bed the other night she said "Mommy, Daddy's freaking out"  and then died laughing.  (He wasn't freaking out, nor had he freaked out)  It's just so funny when she knows what to say to make us laugh..

Have a good week.  I will be posting all of our updates throughout the week.  The list is long.  We've gotten a lot done, and have just as much to do!


Sunday, June 3, 2012

Painted TV Dresser

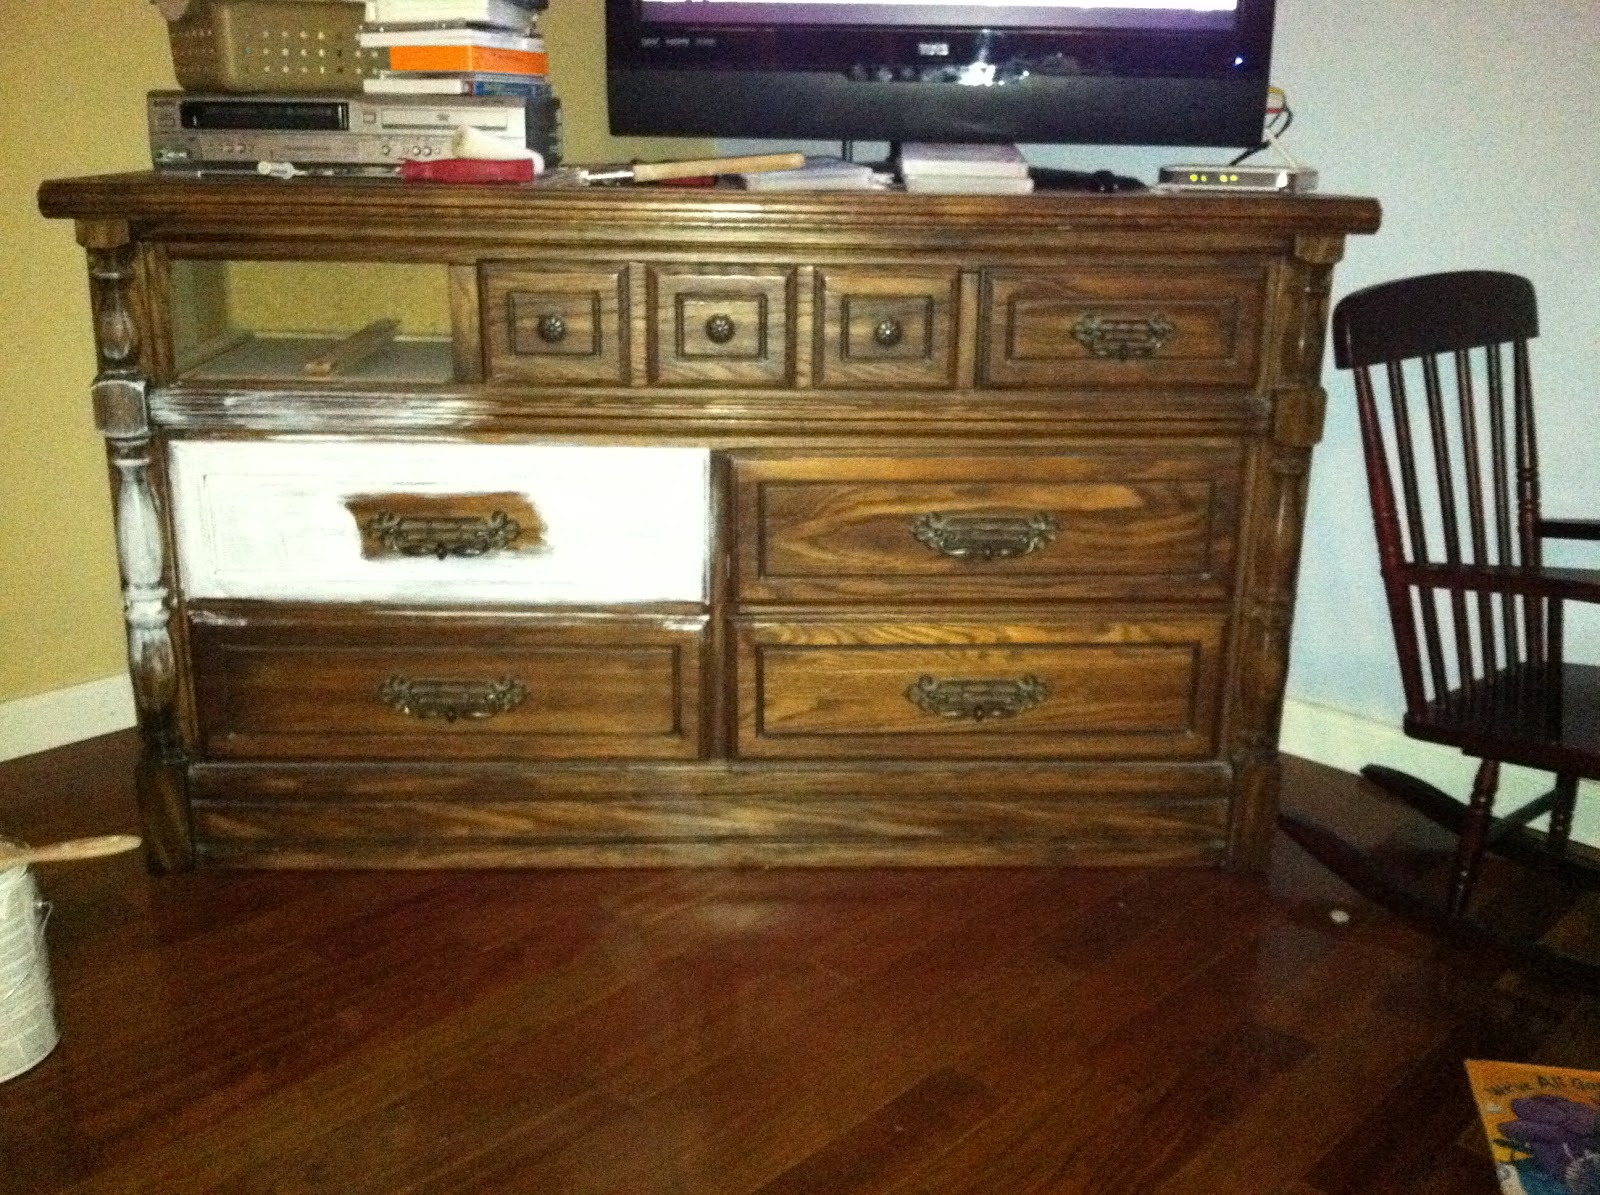
I can't decide where to put the TV in our living room.  I DON'T want it mounted above the fireplace.  I know a lot of people have it there, but it's just not for me.  (Although I am considering it more and more)  I found this dresser for $20 at Goodwill a while ago and it was tacky, but I knew the detailing would look good painted.
So here is the before (one drawer is primed already)


Primed


In the process


Finished

Hello, Belle!

Eventually, I would like to put built ins on the wall with the fireplace, which is where I hope the tv will end up.  Until then, this works for a place to house the tv and all of the kids movies are out of sight in the drawers